Specification:
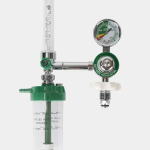
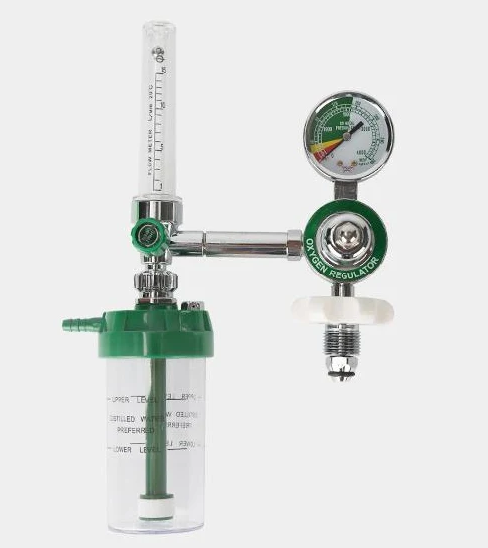
Medical Oxygen Regulator configure humidification bottle.
Pressure measurement range: 0-200 psi (pounds per square inch).
Scale partition:
Green zone: safe working pressure range (usually the usage zone)
Red area: High pressure warning zone (indicating high pressure or caution required)
Flow meter:
Scale range: visible from 0.5 L/min to 10 L/min (liters/minute)
Accuracy: The common minimum scale is 0.5 L/min or 1 L/min.
FAQ:
Q: How to choose models with different traffic specifications?
A: The flow rate (such as LPM liters/minute or SCFH standard cubic feet/hour) determines the gas supply capacity. For example, home oxygen therapy only requires low flow (0-15 LPM), while emergency ventilators require high flow (>50 LPM). Please choose the model based on the maximum demand flow of your downstream equipment.
Q: Does it include a pressure gauge? Is the dial in PSI or Bar units?
A: Yes, our standard configuration includes a high voltage gauge and a low voltage gauge. We offer [Bar] or [PSI] units, please specify when placing your order. We also offer an economy version without a header.
Q: How long is the warranty period? Is there after-sales maintenance service available?
A: We offer a product warranty of [e.g. 12 months] (excluding damage caused by misuse, abuse, or improper use). We provide professional repair and calibration services. Please contact the after-sales department for details.
6.Installing:
Q1: What preparations need to be made before installing oxygen regulator?
Environmental inspection: Ensure that the operating environment is well ventilated, free of open flames, heat sources, and kept away from grease and flammable materials (“four oxygen protections”: oil, fire, heat, and earthquake prevention).
Personnel preparation: the operator needs to wash his hands to ensure that there is no oil stain, cosmetics or alcohol gel on his hands (to be completely volatilized).
Equipment inspection: Check whether the oxygen cylinder is within the valid inspection period (check the steel seal), and whether the cylinder body is severely corroded or damaged. Check whether the appearance of the pressure reducer is intact, free of oil stains, whether the pressure gauge pointer is reset to zero, and whether the threads of each interface are intact.
Check the components: prepare the pressure reducer, suitable sealing gasket (usually brass or PTFE gasket), and special wrench.
Q2: How to prepare the oxygen cylinder valve before installation?
Place the oxygen cylinder firmly upright to prevent tipping over.
Facing the bottle valve outlet, quickly open and close the valve for 1-2 seconds (“blowing dust” operation). The purpose is to use high-pressure oxygen to blow out dust or foreign objects that may exist at the valve port. It is strictly prohibited to aim at people or mechanical equipment during this operation process.
Q3: How to install an oxygen regulator correctly?
Connect the pressure reducer: Place a clean and complete specialized sealing gasket into the intake port groove of the pressure reducer. Align the inlet of the pressure reducer with the outlet of the bottle valve by hand, tighten it preliminarily, and ensure that it is aligned with the correct thread.
Manual pre tightening: Continue to rotate the nut by hand until significant resistance is felt, ensuring smooth thread engagement without tilting.
Tool tightening: Use a specialized fixed wrench (it is strictly prohibited to use a flexible wrench/adjustable wrench to avoid slipping or damaging the nut) to gently tighten. Avoid excessive force to prevent thread slippage. Usually, after tightening by hand, apply a slight force of about 30 degrees.
Check connection: After installation, check whether the pressure reducer and bottle valve are coaxial and stable.
Q4: After installation, how to turn on oxygen and adjust flow rate?
Slowly open the bottle valve counterclockwise until it is fully opened. At this time, the pointer of the high-pressure gauge will rise, indicating the pressure of the gas stored in the cylinder.
Check for leaks: Apply soapy water or specialized leak detector to all interfaces (bottle valve and pressure regulator interface, pressure regulator outlet and flow meter/pipeline interface), and observe for the formation of bubbles. It is strictly prohibited to use open flames for leak detection!
Adjust flow rate: Rotate the flow adjustment knob on the pressure reducer clockwise, observe the low pressure gauge or float flowmeter, and adjust the output pressure or flow rate to the value required by the doctor’s order.
Connect the humidification bottle to the oxygen tube: Connect the humidification bottle with sterile distilled water added to the outlet of the pressure reducer, and then connect the oxygen tube to the humidification bottle.